How to Build on Solana
- Real Vision
- August 17, 2022
- 2:06 PM

Why should developers choose Solana?
Solana has become one of the leading smart contract blockchains. The average transaction fee on Solana is a fraction of a cent, making it an ideal platform for building decentralized applications (dApps). For building on Solana, its native token, SOL, is needed. Solana is very versatile and extremely cost-effective. For comparison, the Ethereum network can process an average of 10 to 30 transactions per second (TPS), while the Solana blockchain can process around 50,000 TPS. This allows Solana to scale considerably better given the Web3 industry’s growing demand for block space. Another advantage is the fact that Solana’s high transaction throughput is not dependent on Layer 2 solutions, as is the case with Ethereum, but solely on the Solana mainchain.
Understand the Future of Everything
Join the Crypto Revolution
Start Your Free Membership Now
100% Free. Yep, You Heard Us


Getting started with building on Solana
To get started building on Solana, no prior experience with smart contracts is required. It is not even necessary to have any blockchain experience. Solana provides developers with a huge variety of resources on the Solana Developers Page. Beginners can use pre-built programs and Software Development Kits (SDKs) to interact and build with. For more advanced developers, Solana allows the building of dApps from scratch using common programming languages, giving a variety of options for the programming workflow.
Building a dApp on Solana is quite similar to how web2 developers build centralized web applications. It only differs in where data is stored (decentralized) and how storage cost is paid for (by the users via transaction fees).
Developing smart contracts (programs) and dApps on Solana
As with most smart contract blockchains, there are two different development workflows. First, it is possible to develop unique smart contracts (referred to as ‘programs’ on Solana). Alternatively, dApps can be created.
To build smart contract programs from scratch on Solana, developers need to be familiar with the programming languages Rust, C, and C++. Smart contracts are deployed on-chain and are run via Solana Runtime. Anyone who knows how to communicate with them by submitting transactions with instructions to the network can use them or build on top of them. Therefore, Solana Labs created two sets of smart contract programs that are maintained as part of the core software releases: Native Programs and the Solana Program Library (SPL).
The Native Programs form the backbone of the Solana ecosystem. Of these, the most commonly used is the System program. It is through the System smart contract program that accounts can be created and SOL can be transferred. Other popular Native programs include the Staking Program and the Voting program. The SPL on the other hand includes many different smart contract programs such as the Token program. This allows users to interact with tokens on the Solana blockchain, including non-fungible tokens (NFTs). Minting, transferring, burning, or querying tokens are all made possible by using this program.
DApp development involves creating applications that send transactions with instructions to on-chain smart contract programs. The foundation of dApp development on Solana is the JSON RPC API (Solana’s own Application Programming Interface), which is a layer of communication that allows developers to interact with the blockchain. To make it easy to talk to the blockchain and Solana programs, Solana Labs has created an easy-to-use software development kit.
Some of the recent most popular dApps built on Solana are:
— Gameta (gaming)
Entrance to Web3, from gaming to meta;
— MeanFi (DeFi)
A self-custody, permissionless, and trustless bank;
— Soldex (DEX)
Scalable and decentralized exchange;
— SolSea (marketplace)
The first open NFT marketplace on Solana. It introduces NFTs with embedded licenses, low trading fees, and real-time analytics from on-chain data.
How to build NFTs on Solana: A step-by-step guide
Throughout 2021, NFTs made headlines with projects such as CryptoPunks and Bored Ape Yacht Club (BAYC), some of which had sold for over 100k. These headlines resulted in a boom with hundreds of NFT projects following the hype.
The first go-to blockchain was the Ethereum network, on which most NFT projects have been created as ERC-721 tokens. However, several problems quickly became apparent. Due to network congestion, transactions took a long time to process and fees were extremely high.
As a result, creators searched for faster and cheaper network options. This is where Solana comes into play. It provides users with the possibility to create NFTs that are cheaper to mint and transfer.
On Solsea.io, Solana’s open NFT marketplace, it is possible to create a single NFT or a whole collection of NFTs. To mint an NFT, you are not required to be a programmer or know how to code. The following steps show how easy it is to get started with creating NFTs on Solana via Solsea.io.
Step 1 — Create and fund a Solana wallet
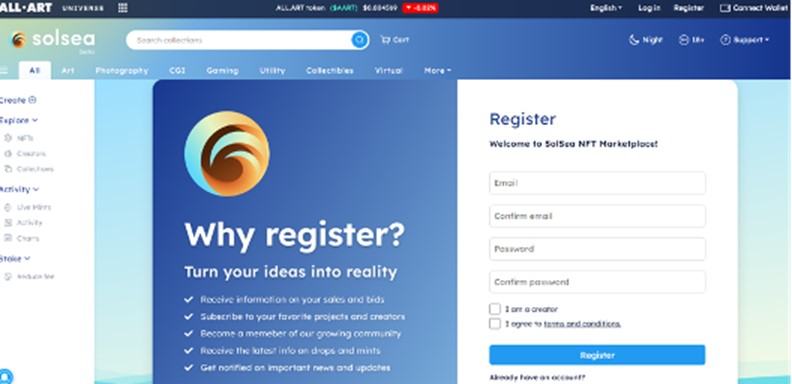
Step 2 — Connect the wallet and register
If you connect your wallet for the first time on solsea.io, you will be required to register with an email and a password.
Step 3 — Choose whether to create a whole collection or a single NFT
Via the creator’s dashboard, you can manage your portfolio. It is possible to upload only one NFT or to create a whole set of NFTs bunched together in a collection.

Step 4 — Upload preview and final file
Once you have designed the NFT, you can upload a static (max. 10MB as .jpeg, .png or .gif) or animated preview (max 10MB as .mov or .mp4) as well as the final artwork (max 40MB as .jpeg, .png, .gif, .mov, .mp4, .mp3, .wav or .ogg).
Step 5 — Enter all information (title and description)
Give your NFT a title as well as a short and a long description of the artwork. In this step, it is important to double-check the spelling and the accuracy of all information. This is because it is not possible to change them after minting the NFT.
Step 6 — Seller fee royalties
Go on to set the percentage of revenue you wish to receive from secondary sales of your NFT. Keep in mind that not every marketplace supports this feature and enables a fair distribution of royalties from secondary sales. You have to type in a number ranging from 0-50.
Step 7 — External URL
If you have a webpage where you promote your artwork or work in general, you can put in the link so that users can learn more about your work.
Step 8 — Tags
Additionally, you can select the type of the NFT so that it will show up when someone uses particular search terms. From the list that is given, choose the tags that fit best.
Step 9 — License
Now you have to set up the license for your NFT. SolSea provides a full description in the license scope summary. Choose wisely because you cannot change this setting after minting.
Step 10 — Collection
If the NFT belongs to a collection, you can add it by selecting the name of the collection.
Step 11 — Traits
Now you have to provide the traits. Traits function as filters or keywords. The more traits you set, the easier your NFTs will be found on the marketplace. You can add more than one trait. A trait could be for example the color of the background, special accessories, etc.
Step 12 — Mint your final NFT
After double-checking all information, you can now mint your NFT. As a creator, you have to pay gas fees to mint your NFT, so make sure your wallet is loaded with SOL.
After completing the above steps, you have now successfully minted your first NFT on Solana. Congratulations!
